How to Fix your Kite – DIY Bladder, Strut, and Canopy Repair

A sad, sad, broken kite.
I was sitting around in Hawaii for a week, waiting for the weather and swell to get better, before I opted to try my hand at kite repair.
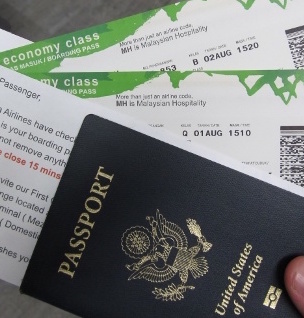
My friend convinced me to bring kitesurfing gear on my trip to the North Shore (“it’s always windy on the East side dude. That’s why they call it the windward side.) and somehow I managed to sneak it onto Hawaiian airlines without paying the mandatory $100 fun tax (more on how to do that later).
The kite that inspired this post, my beloved ’09 12-meter RRD Obsession, had a pretty nasty run-in with a blackberry bush at Sherman Island last summer. Since I’d been traveling for the last 7 months I hadn’t had a chance to look at it, but this proved to be the perfect opportunity (ie, stuck on the North Shore with nothing to do).
While I was ready to drop 100 bones on professional repair, the local kiteboarding shop in Kailua told me to do the shit myself (typical surfer/kitesurfers running a business). I decided this was a good idea when they told me it would probably take 1-2 weeks to get the kite back anyway.
So I spent $15 on some white, supposedly clear repair tape (actually not) and kite bladder patching material (Tear-Aid), got some advice on the procedures, and then was promptly offered a job repairing kites if I was able to figure it out myself (“You know, we have this whole back room full of broken kites….”). That’s the second kite-related job I’ve been offered in 6 months (while I’m still a newbie I was offered a kiteboarding job in Mancora, Peru. What does that tell you about Peru, or Mancora?).
Anyway, I tackled the series of canopy tears and bladder puncture on a drizzly North Shore afternoon, and here’s what went down:
Step 1: Learning how to repair kites
Since I knew nothing about kite repair, I’d have to download some information. After about 15 minutes on Youtube I stumbled across three videos put out by flyozone. By far the best instructional videos I found, and they pretty much cover all the bases. Watch them BEFORE you start doing anything. If I had done that I wouldn’t have ugly rectangular patches on my sail right now.
Here’s what things looked like before I got started:

Step 2: Getting my Hands Dirty
The first thing I did was general canopy repair, covered below.
This is pretty much a no-brainer, just make sure the kite is clean before you try to put the tape on, put tape on both sides, and round the edges of the tape if you don’t want it coming off anytime soon.
Not pretty, but I’ve come to understand that I can’t really have nice things:

Once I got some tape on the sail, I moved on to leading-edge bladder repair. I had to find the hole first, witch was a visual challenge, but after about 30 seconds with a sponge and soapy water I was able to locate the puncture (starting at the most damaged end of the kite of course).
Here’s the video on leading edge canopy repair:
Since the RRD Obsession kites are a one-pump system, you also have to watch the video on strut removal to figure out how to deal with the connections. I ran into problems with this (see below).
Everything went pretty swell until I tried to disconnect the strut connections on the leading edge – the hole they come out of is too small to wrap line around them. At first I thought I was screwed — how would I get them back out if I pushed them in? Turned out not to be a big deal. I called Hawaiian Watersports in Kailua (where I went in the first place) and they told me to just push them through. When it was all said and done it was real easy to line them up and put everything back together.
This clearly doesn’t work:

The hardest part of the whole operation was pushing the leading edge valves into the leading edge. It took a lot of force, the handle of a pair of pliers, and some choice cursewords to get the two strut valves in there.
Once I pushed them in it was a piece of cake to pull the bladder out. Just make sure you don’t forget to girth hitch the end of the bladder with your kite lines before you do it or, uh, you’re in trouble (watch the video dude).

Here is the hole – no problem finding that:

A little Tear-Aid on that and everything was good to go.

Putting the bladder back in proved to be a two-man job, but ultimately the whole operation was surprisingly easy. Mission accomplished, and I just saved at least $85.

Pay for kite repair again? Well, if the bladder explodes I don’t think I can manage heat-sealing it, but anything like this is an easy repair. Right now I have a lot of time and no money, so….
Hey, maybe I’ll give Hawaiian Watersports a call about that room full of broken kites.
Get SpartanTravel Updates:
Get the good stuff: travel hacks and tips, straight to your inbox. And don't worry, I won't spam you, ever.


